Wizmo - Onboarding
This article covers everything regarding onboarding a Wizmo carrier account.
All Wizmo Clients will need the origin location/address on their profile to be their Canada location for shipping with Wizmo.
Work with the Wizmo account rep to see which services they would like enabled for the client.
What is Wizmo?
Wizmo Setup – Walkthrough
To add a Wizmo account:
1) Navigate to Settings
2) Click on Carrier Accounts
3) Click "+ New Carrier Account".
4) The Add Carrier window will open. Scroll down to locate the option for Wizmo, and click the "Add Account" button underneath the Wizmo logo.
The Wizmo carrier option is not visible to the client, so you will need to assist in adding it.
Wizmo Carrier Setup Window
 Account Name – Enter the customer's name in the account name field.
-
-
Example: “Client Name – Wizmo”
-
- Account Number – provided by a Wizmo Rep.
- Username & Password – supplied by a Wizmo Rep.
- Account Code - the same number as the Account Number.
- Origin Terminal - enter "TOR" unless otherwise specified by a Wizmo Account Rep.
Wizmo Onboarding Notes:
- All Wizmo Clients will need the origin location/address on their profile to be their Canada location for shipping with Wizmo.
- Work with the Wizmo account rep to see which services they would like enabled for the client.
- Carrier Codes must be enabled/disabled for the respective customer using DS ADMIN.
- If you do not have access to this page, please ask your supervisor to assist in enabling these and contact a manager to get access.
- If carrier codes are already enabled that the Wizmo Rep. has not asked for, disable these for a cleaner customer experience.
- If you have moved a client from portal to ship, remove any old carrier codes from Carrier service groups and inbound/outbound Carrier settings before disabling.
- Please note that when you remove these carrier codes from service groups and press save, they will still appear as applied after saving (this is an inconsequential software display issue). Please continue removing code from all service groups and mappings and then disable the code using DS ADMIN. Once carrier codes are, have the customer log out and back in to see that the services have been removed from the groups.
- Please note that when you remove these carrier codes from service groups and press save, they will still appear as applied after saving (this is an inconsequential software display issue). Please continue removing code from all service groups and mappings and then disable the code using DS ADMIN. Once carrier codes are, have the customer log out and back in to see that the services have been removed from the groups.
The most common setup for service groups will fall into 2 categories.
Setup #1: The client wants to use the "tracked packet" service when possible and only send partially tracked when the country is not supported.
Do not use a service group for this request, as the cheaper/partially tracked options will always be selected based on the returned rate. Instead, create a direct marketplace mapping for "WZ77: Wizmo Asendia Fully Tracked Packet" and use the "WZ91: Wizmo Asendia Partially Tracked PostalDDU" service as an alternate ship method.

Setup #2: The client wants packages continuously to be tracked.
To continuously track a package regardless of cost, put "WZ77" and "WZ89" into a service group.

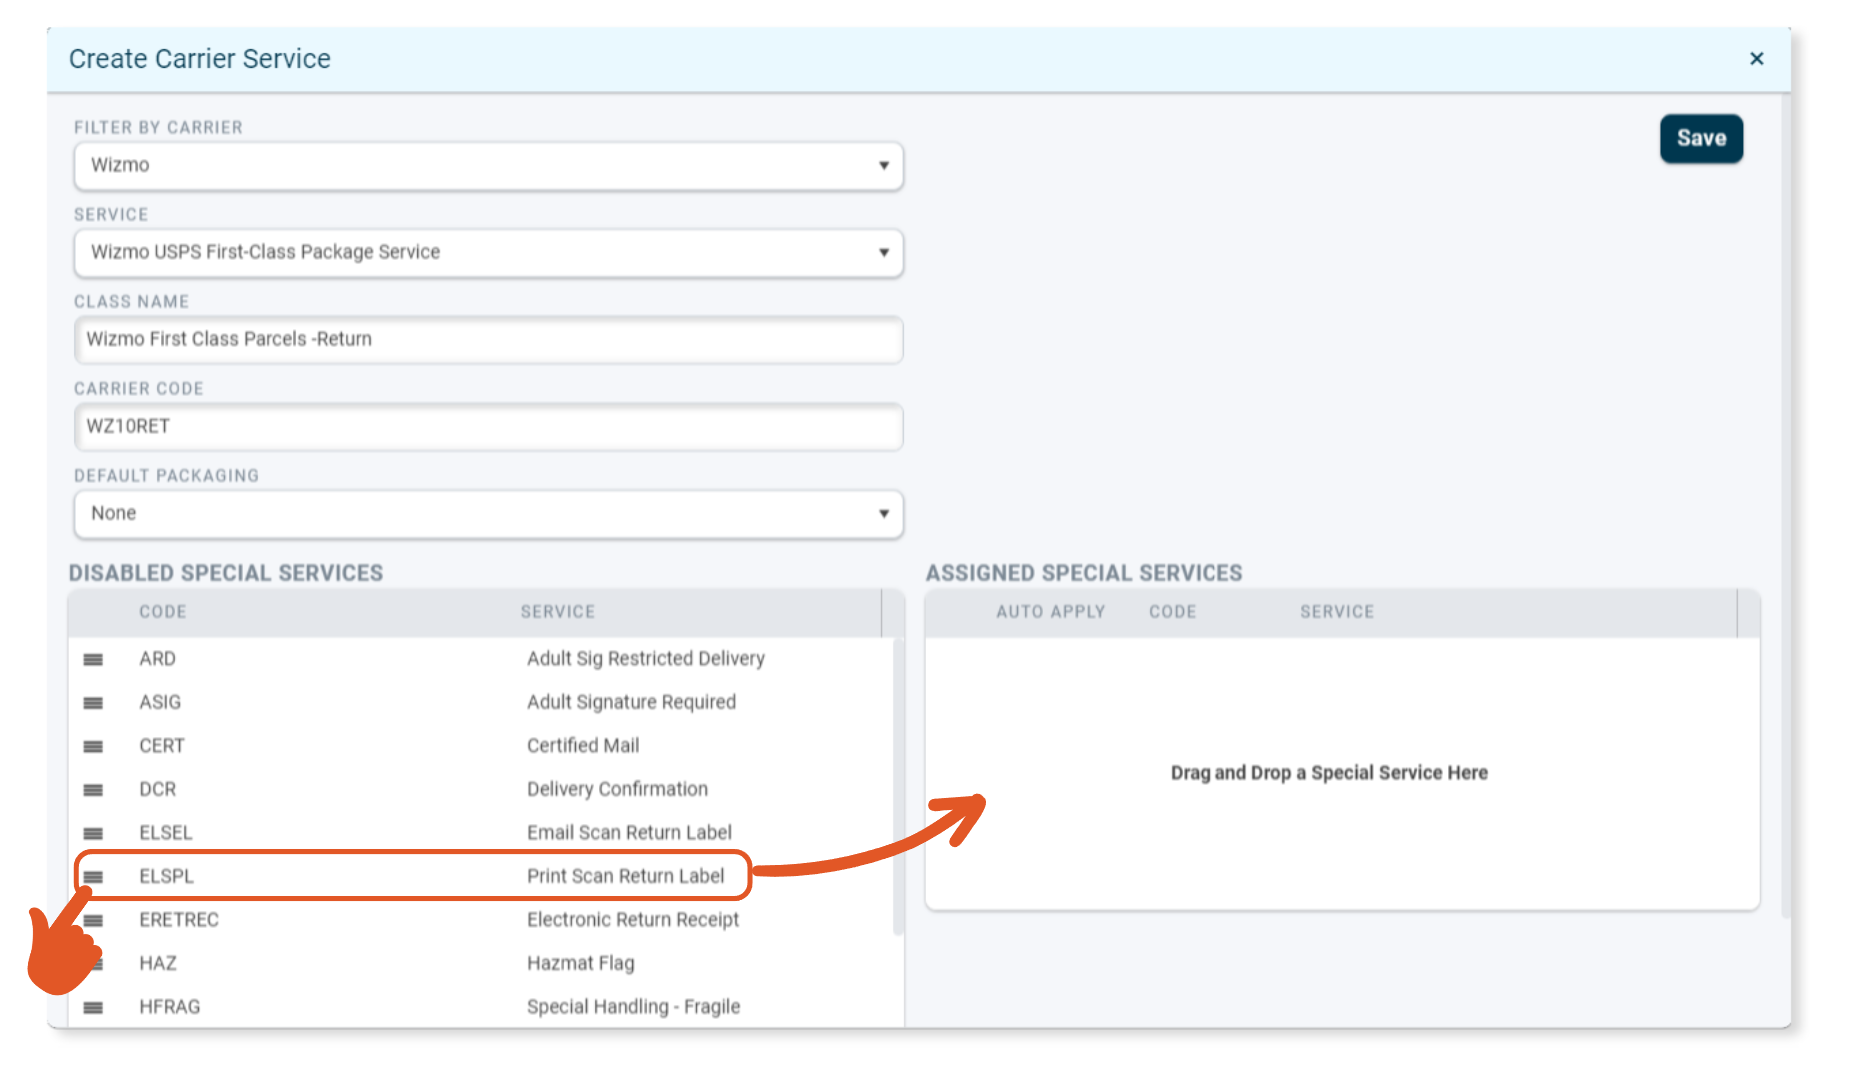
Create a Wizmo Return Service
To Create a Wizmo Return Service:
1) Navigate to Settings.
2) Click Services.
3) Click "+ New Carrier Service".

4) Filter ByCarrier: Select Wizmo from the drop-down.
5) Service: For this example, select the US to Canada return service supported service for the base service. "Wizmo USPS First Class Package Service" was selected in this example.
6) Class Name: keeping the class name; however, add text to identify the service as a return service, such as append "-return" to the end of the class name.
7) Carrier Code: Add "RET" to the end of the service code. Example: "WZ10RET".
8) Drag the "ELSPL" and/or ELSEL" Disabled Special Services " to the Assigned Special Services section.
9) Enable the Auto Apply checkbox to enable the return service option automatically.

If the customer does not want return services to be added automatically, you do not have to enable the "Auto Apply." This is optional. Alternatively, they can manually apply the Print or Email Scan return label special service during the return order processing.
10) Click ![]()
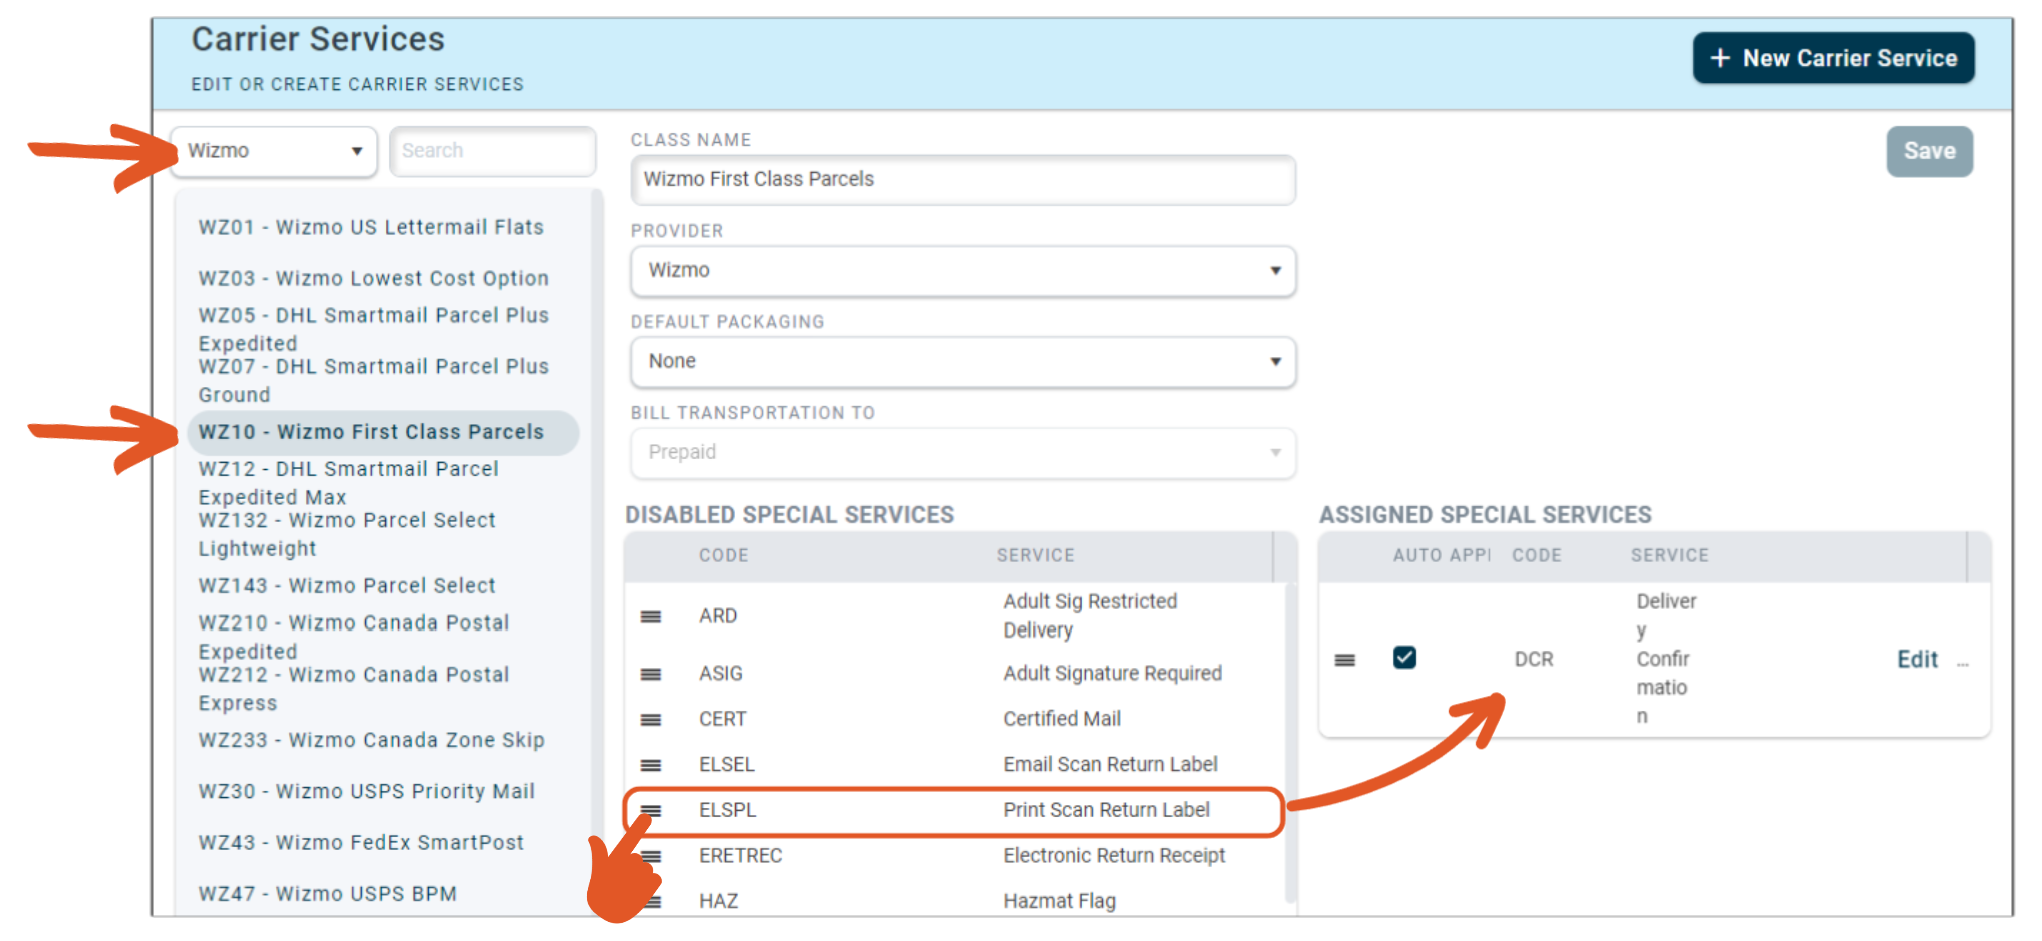
Adding the Return Special Service to an Existing Wizmo Service
To Create a Wizmo Return Service:
1) Navigate to Settings.
2) Click Services.
3) Use the carrier dropdown to select Wizmo.

4) Select one of the return service-supported Wizmo services.
5) Drag the "ELSPL" and/or ELSEL" Disabled Special Services " to the Assigned Special Services section.
6) Keep the "Auto Apply" disabled so the shipper can manually enable the return service when needed during the shipping process.
7) Click ![]()
![]()